
For every developer, system administrator, and cybersecurity professional, cURL stands as an indispensable utility within their command-line toolkit. It’s widely recognized as the ultimate Swiss Army knife for initiating web requests, facilitating seamless data transfers, and meticulously debugging APIs. While executing a basic GET request with cURL is inherently straightforward, unlocking the full spectrum of its capabilities hinges on mastering one of its most pivotal features: HTTP headers.
A profound understanding of how to adeptly manipulate cURL headers empowers you to achieve a multitude of critical tasks. This includes securely authenticating with various APIs, precisely specifying content types for data transmission, accurately mimicking different web browsers to bypass restrictions, and much more. This comprehensive guide is designed to offer a practical, hands-on journey through every essential aspect of viewing, sending, and deeply customizing headers using cURL, all presented with easily digestible, copy-and-paste examples for immediate application.

What Are HTTP Headers? A Foundational Refresher
Before we dive into the specific cURL commands and their practical applications, let’s quickly solidify our understanding of what HTTP headers truly are and why they are so fundamental to web communication. In essence, HTTP headers are the metadata, or additional information, appended to both requests sent by a client (such as your web browser or a cURL command) and responses returned by a server. Think of them as the meticulously labeled instructions on an envelope, providing vital context for the message contained within.
Each time a client communicates with a server, it initiates a request, and in turn, the server sends back a response. HTTP headers accompany both these messages, conveying critical details that define the interaction. These pieces of metadata offer crucial insights, such as:
User-Agent: Identifies the client software making the request, helping the server understand who is accessing the resource (e.g., a specific browser, a mobile app, or a cURL script).Content-Type: Specifies the media type of the resource being sent in the request body (e.g., JSON data, XML, form data) or received in the response body. This is crucial for proper parsing.Authorization: Carries credentials or tokens required to authenticate the client with the server, ensuring that only authorized users or applications can access protected resources.Accept: Informs the server about the types of content (e.g.,application/json,text/html,image/jpeg) the client can process and prefers to receive in the response.Cookie: Transmits small pieces of data (cookies) that the server previously sent to the client, primarily used for session management, tracking, and personalization.
By effectively manipulating these essential HTTP headers with cURL, you gain granular and precise control over every aspect of your web requests, making it an invaluable skill for diverse web-related tasks.
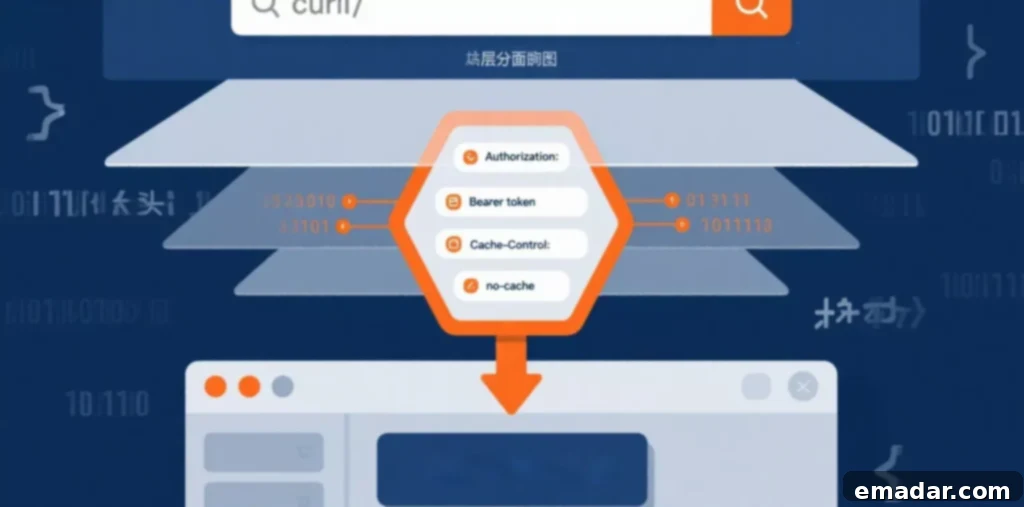
Mastering cURL to View Response Headers
One of the initial yet most critical steps in debugging web applications, understanding API responses, or analyzing server behavior is to meticulously inspect the headers a server sends back to your client. cURL provides several intuitive flags specifically designed for this purpose, offering varying levels of detail.
--include or -i: This versatile flag instructs cURL to include the full HTTP response headers directly in its output, preceding the actual body of the response. This is incredibly useful when you need to see both the metadata and the content.
curl -i https://api.example.com/statusExecuting this command will display the initial status line (e.g., HTTP/1.1 200 OK), followed by all the response headers (such as Content-Type, Date, Server, Cache-Control, etc.), and finally, the actual content or payload of the requested page or resource.
--head or -I: If your primary objective is to inspect *only* the headers without retrieving the potentially large response body, this flag is your best option. It sends an HTTP HEAD request, which is specifically designed to ask the server for just the metadata associated with a resource, rather than the full resource itself. This is efficient for checking resource existence, content type, or last modification dates without wasting bandwidth.
curl -I https://api.example.com/status--verbose or -v: For situations demanding the absolute maximum level of detail regarding a request and response, the verbose flag is unmatched. It provides a comprehensive log of the entire communication process, including the specific request headers you sent, the full response headers received, details about the SSL/TLS handshake, connection information, and even redirects. This is invaluable for deep debugging and understanding network interactions.
curl -v https://api.example.com/statusEmpowering Your Requests: Sending Custom Headers with cURL
This is where cURL truly demonstrates its unparalleled power and flexibility. By leveraging the --header or its shorthand -H flag, you gain the ability to define and send virtually any custom header along with your HTTP request. This capability is fundamental for interacting with modern web services and APIs. The syntax is elegantly simple: -H "Header-Name: Header-Value". Let’s explore some of the most common and critical use cases.
Example 1: Precisely Setting the Content-Type for a POST Request
When you’re submitting data to an API, especially via a POST or PUT request, it’s absolutely essential to inform the server about the exact format or media type of the data you are sending in the request body. This allows the server to correctly parse and process your payload. The Content-Type header is critical for this negotiation.
curl -X POST \
  -H "Content-Type: application/json" \
  -d '{"name":"John Doe","email":"[email protected]"}' \
  https://api.example.com/users
In this example, we explicitly tell the server that the data enclosed in the -d (data) flag is in application/json format. Other common Content-Type values include application/x-www-form-urlencoded for traditional HTML form submissions, text/xml for XML payloads, or multipart/form-data for file uploads.
Example 2: Sending an Authorization Token for Secure API Access
The vast majority of modern APIs implement authentication mechanisms to secure their endpoints. This often involves sending a security token or an API key within the Authorization header. The “Bearer Token” scheme, commonly used with OAuth 2.0, is a prime example.
curl -H "Authorization: Bearer your_super_secret_api_token" \
  https://api.example.com/v1/my-data
This command sends your unique authentication token, allowing the API server to verify your identity and grant access to the requested protected resource. Other authorization schemes include `Basic` (for username/password pairs) or custom API key headers (e.g., `X-API-Key`).
Example 3: Changing the User-Agent to Mimic a Browser or Device
By default, cURL identifies itself with a User-Agent string like curl/7.x.x. However, many websites, APIs, or anti-bot systems specifically look for browser-like User-Agent strings and might block or serve different content to clients they don’t recognize. By spoofing the User-Agent, you can effectively impersonate a standard browser, enabling access to content that might otherwise be restricted.
curl -H "User-Agent: Mozilla/5.0 (Windows NT 10.0; Win64; x64) AppleWebKit/537.36 (KHTML, like Gecko) Chrome/128.0.0.0 Safari/537.36" \
  https://www.example.com
This technique is invaluable for web scraping, testing how a site renders for different browsers or operating systems, or accessing mobile-specific versions of websites.
Example 4: Leveraging the Accept Header for Content Negotiation
The Accept header is used by the client to tell the server what media types it can understand and prefers to receive in the response. This is crucial for APIs that can return data in multiple formats (e.g., JSON, XML, HTML).
curl -H "Accept: application/json" \
  https://api.example.com/products
Here, you’re explicitly requesting a JSON response. If the server supports it, it will prioritize sending JSON data. You can specify multiple preferred types, separated by commas, and even assign quality values (q-values) to indicate preference.
Example 5: Sending Multiple Headers Simultaneously
In real-world scenarios, you’ll frequently need to send several custom headers within a single request. cURL seamlessly supports this by allowing you to use the -H flag multiple times in the same command.
curl -H "Authorization: Bearer your_token" \
  -H "Accept: application/vnd.api+json" \
  -H "X-Custom-Header: MyValue" \
  https://api.example.com/v1/posts
This demonstrates how to combine authentication, content negotiation preferences, and even custom application-specific headers in a single, powerful cURL command.
Advanced Integration: cURL Headers with Proxy Servers for Enhanced Control
For demanding tasks such as large-scale web scraping, comprehensive SEO monitoring, geo-specific content testing, or bypassing regional restrictions, you’ll almost invariably need to route your cURL requests through a proxy server. cURL facilitates this with the straightforward -x or --proxy flag. However, merely using a proxy is often insufficient in today’s sophisticated web environment.
Modern anti-bot and anti-scraping systems have evolved significantly beyond simple IP address checks. They employ advanced fingerprinting techniques, analyzing a multitude of factors including the consistency and realism of your HTTP headers, JavaScript execution environment, and even browser-specific characteristics. This means that even with a clean proxy IP, a poorly configured set of headers can still lead to detection and blocking.
This challenge becomes particularly relevant when utilizing high-quality residential proxy networks. To fully leverage the capabilities of a premium service like IPFLY, which offers genuine residential IPs designed to seamlessly blend in and avoid detection, your cURL headers must be meticulously configured to authentically mimic a real user’s browser. Combining a dynamically rotating, clean IP from IPFLY with a carefully crafted, realistic User-Agent header and other browser-like headers (like Accept-Language, Accept-Encoding, and Referer) forms an incredibly robust and successful strategy for data collection and unhindered web interaction. This synergy is key to bypassing the most resilient anti-bot measures.
curl -x http://your_proxy_server:port \
  -H "User-Agent: Mozilla/5.0 (Macintosh; Intel Mac OS X 10_15_7) AppleWebKit/537.36 (KHTML, like Gecko) Chrome/128.0.0.0 Safari/537.36" \
  -H "Accept-Language: en-US,en;q=0.9" \
  -H "Accept-Encoding: gzip, deflate, br" \
  https://example.com/data
Essential cURL Headers Cheatsheet for Rapid Reference
To aid in your day-to-day tasks, here’s a quick and practical reference for some of the most frequently used and crucial HTTP request headers you will encounter and manipulate with cURL:
| Header Name | Description and Common Use Cases |
| Authorization | Carries authentication credentials (e.g., Bearer Token, Basic Auth) to verify the client’s identity with the server, granting access to protected resources. |
| Content-Type | Specifies the media type of the resource included in the request body (e.g., application/json, application/x-www-form-urlencoded, text/xml), enabling the server to parse it correctly. |
| Accept | Communicates to the server the media types that the client can understand and prefers to receive in the response, facilitating content negotiation (e.g., application/json, text/html). |
| User-Agent | A string that identifies the client software, operating system, and potentially the device making the request. Used for browser mimicking, analytics, and anti-bot detection. |
| Cookie | Sends previously stored HTTP cookies from the client back to the server. Essential for maintaining session state, user tracking, and personalization across requests. |
| Cache-Control | Provides directives for caching mechanisms in both client requests and server responses. Determines how, for how long, and by whom a resource can be cached (e.g., no-cache, max-age=3600). |
| Referer | Indicates the URL of the page that linked to the current requested resource. Often used for analytics, security, and sometimes for bypassing content restrictions. |
| Host | Specifies the domain name of the server and the port number (if not default) that the client is requesting. Crucial for virtual hosting where multiple domains share an IP address. |

In conclusion, mastering the manipulation of cURL headers elevates this robust command-line tool from a mere file downloader into a highly sophisticated instrument for comprehensive interaction with the modern web. By thoroughly understanding how to effectively view response headers using the -i and -I flags, and more crucially, how to meticulously craft and send custom request headers with the powerful -H flag, you gain the precise, fine-grained control absolutely essential for contemporary API development, intricate debugging scenarios, advanced web scraping, and efficient data automation.
This fundamental skill is not just beneficial; it is truly indispensable for any developer, system administrator, or security professional aiming to work with web services and internet resources effectively, efficiently, and securely from the command line. Empower yourself by taking full command of your HTTP interactions.
Hey folks! Ready to elevate your proxy game and discover the latest tricks for seamless web interactions? Make your way straight to IPFLY.net for exceptional proxy services that prioritize reliability and anonymity. Then, take the next smart step and hop into the vibrant IPFLY Telegram community—we share daily tips, expert advice, and valuable insights, making it easy for even newcomers to quickly grasp advanced strategies. Don’t delay, join us today and become part of our growing community!