
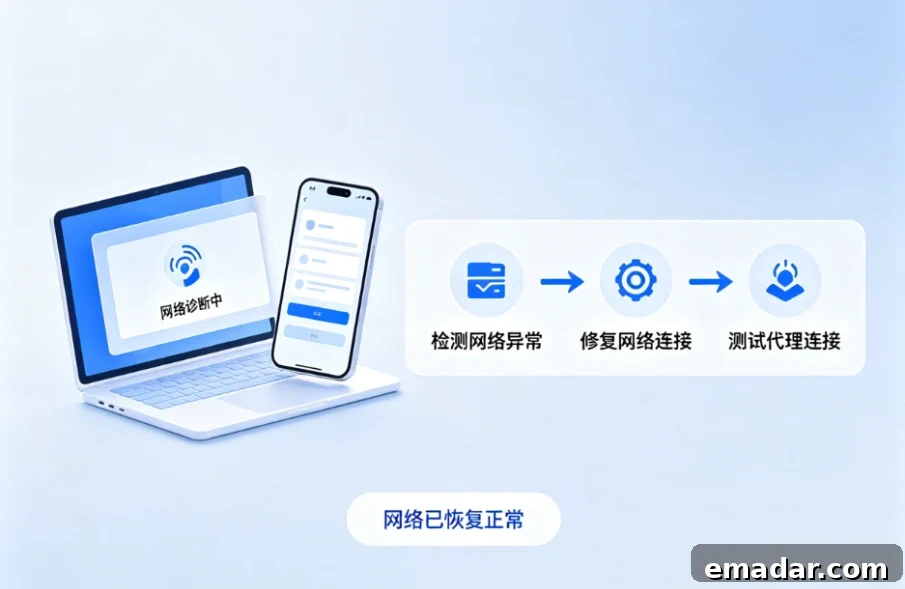
Recently, AdsPower released a new Network Diagnosis feature that centralizes local network checks, system proxy inspection, and log reporting on a single page to help users identify proxy and network issues faster.
After launch, we noticed an interesting trend from conversations with some customers: many people previously judged a proxy IP as usable simply by whether a web page could be opened.
However, being able to open a page does not necessarily mean the network environment is healthy, nor does it guarantee that the IP quality is acceptable.
In this article we use IPFLY static residential proxies as an example to walk through configuring a proxy in AdsPower and using the Network Diagnosis tool to quickly verify whether the proxy environment is functioning properly.
Step 1: Obtain IPFLY proxy details
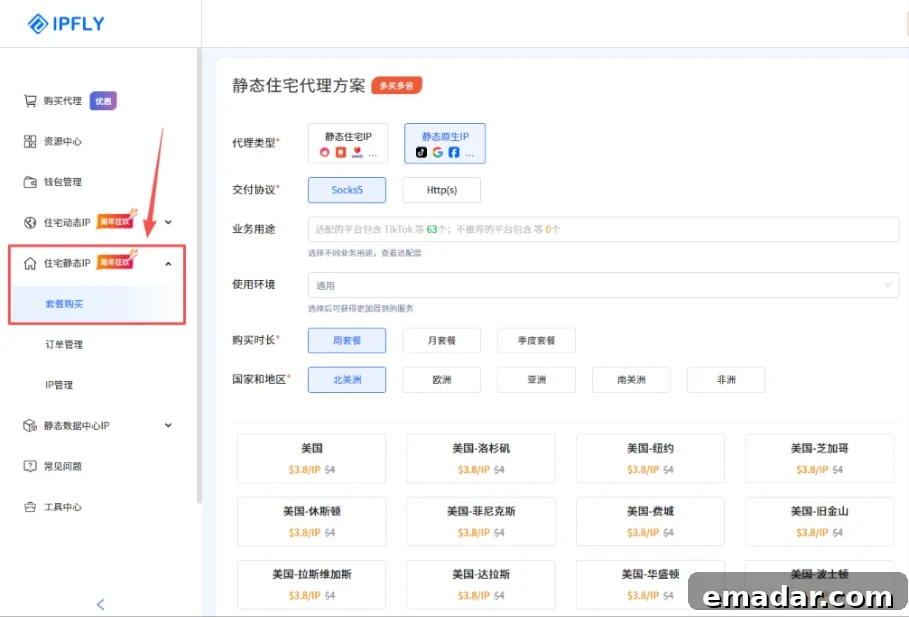
Register and log in to IPFLY. In the user dashboard choose parameters that match your needs, such as:
- Country or region
- IP type
- Protocol type
- Platform or scenario
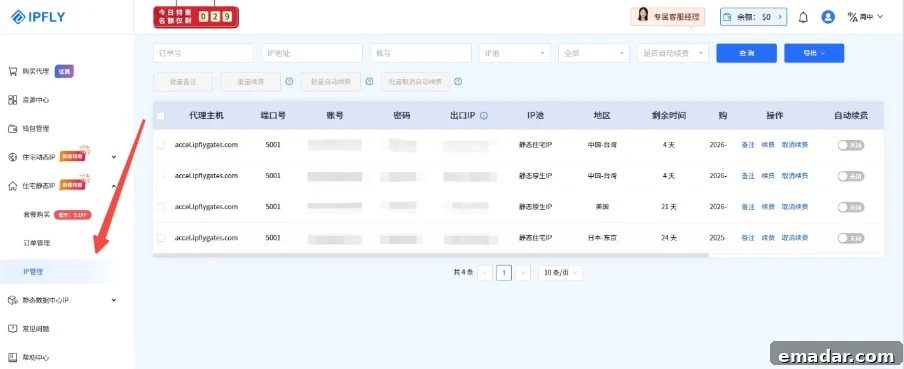
After selecting, generate the proxy and copy the connection details. Be sure to record:
- Proxy protocol (HTTP / HTTPS / SOCKS5)
- Proxy host (Host)
- Proxy port (Port)
- Proxy username (Username)
- Proxy password (Password)
These values will be used when configuring the proxy in AdsPower.
Step 2: Configure the proxy in AdsPower
Open AdsPower and click “New Browser” to enter the basic browser settings:
- Browser name
- Group
- Browser engine
- Operating system
If you already have a browser environment, you can also edit it directly for testing.
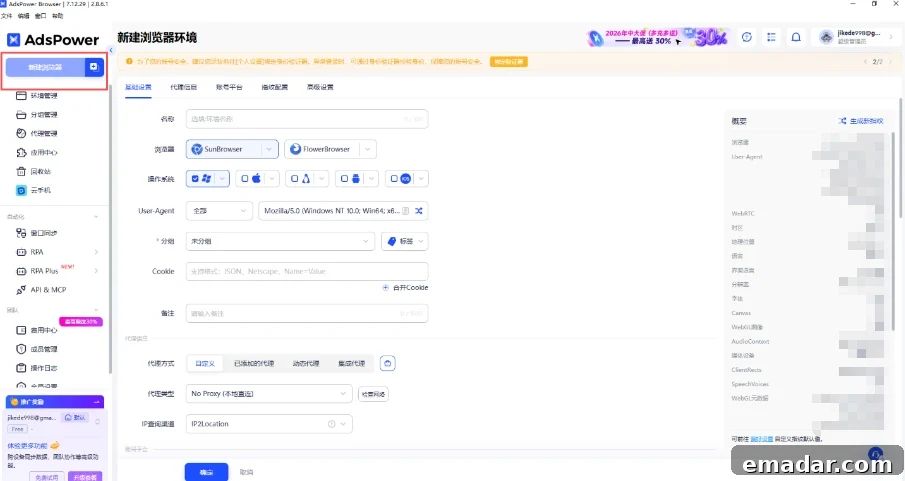
In the proxy configuration area, choose the protocol provided by IPFLY:
- HTTP
- HTTPS
- SOCKS5
Then fill in the host, port, username, and password fields according to the IPFLY information.
Step 3: Verify the proxy connection
After entering the proxy settings, click the “Check Proxy” button on the right. The system will automatically test the current proxy status.
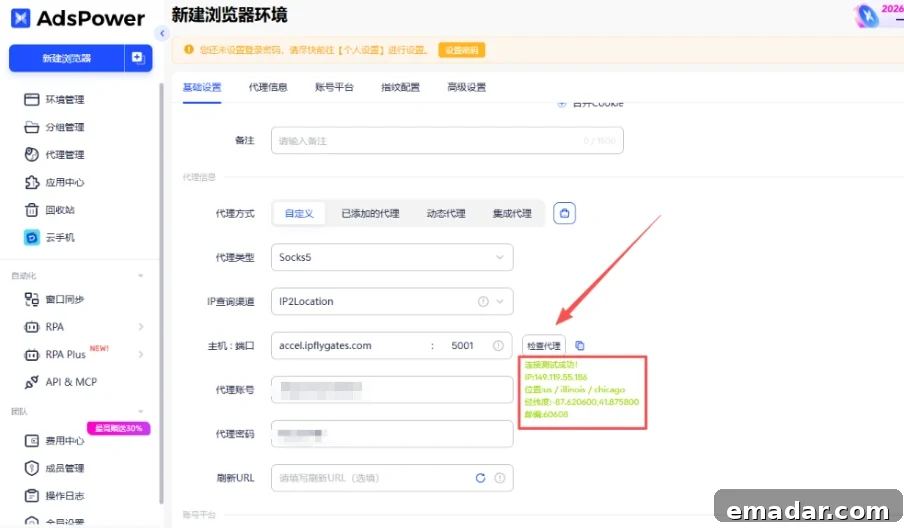
If the result shows “Connection Test Successful,” it indicates that:
- The proxy username and password are correct
- Network connectivity is functioning
- The current proxy is usable
You can also view details such as:
- IP address
- Country or region
- City geolocation
- Timezone information
This is the fastest way to confirm whether the proxy is taking effect.
Step 4: Use Network Diagnosis when the connection fails
If you see “Connection Test Failed,” the proxy connection has an issue.
Instead of repeatedly changing settings at random, click “Network Diagnosis” to run a structured check and identify likely causes.
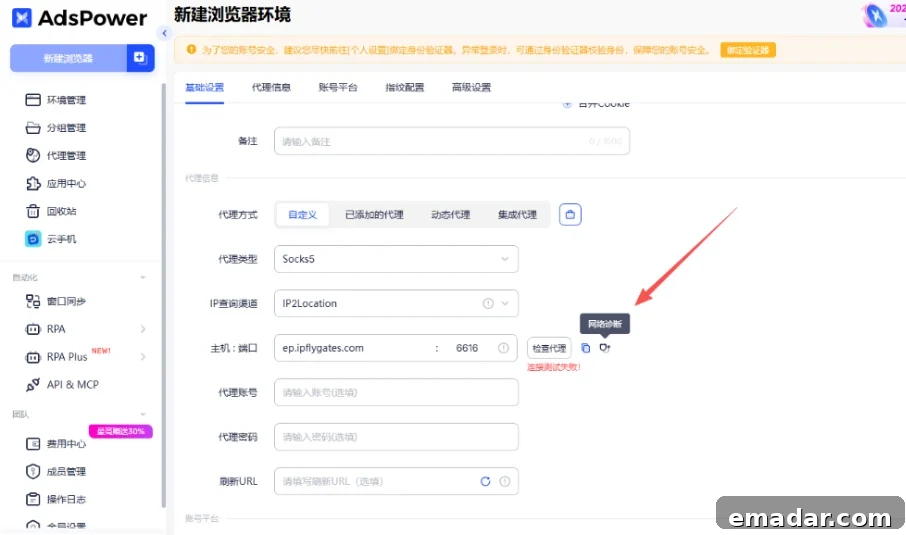
On the diagnosis page the system automatically inspects the current network environment, including:
- Local network status
- DNS resolution
- System proxy settings
- Proxy connection details
- Log information
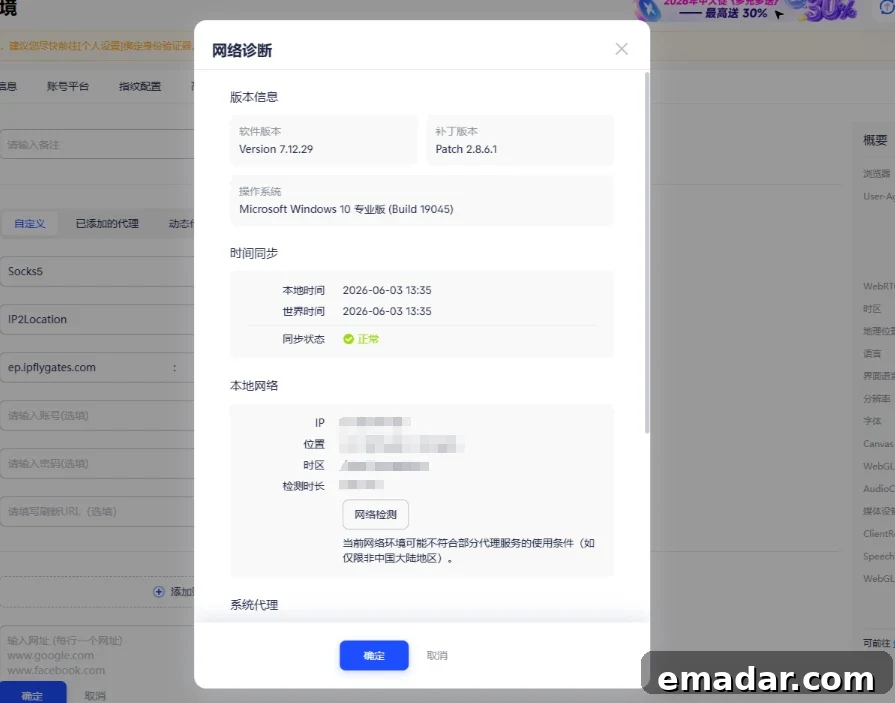
Use the diagnosis results to quickly pinpoint the origin of the problem and take targeted action.
Step 5: Run Network Diagnosis proactively
AdsPower also supports proactive checks. Click the avatar in the top-right corner of the client and select “Network Diagnosis”.
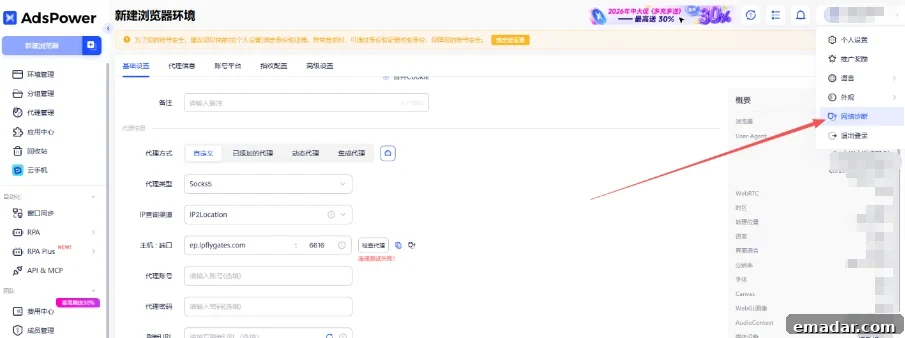
This proactive approach is best for:
- Pre-checking new proxies before putting them into service
- Testing before bulk environment configuration
- Routine network health checks
Read the results from top to bottom; if all items report normal, your network environment has no obvious issues.
Step 6: Complete browser environment setup
Once the proxy connection is verified, return to the browser creation page to finish configuring the environment.
1. Account platform
Select the target platform you plan to access, for example:
- TikTok
- Amazon
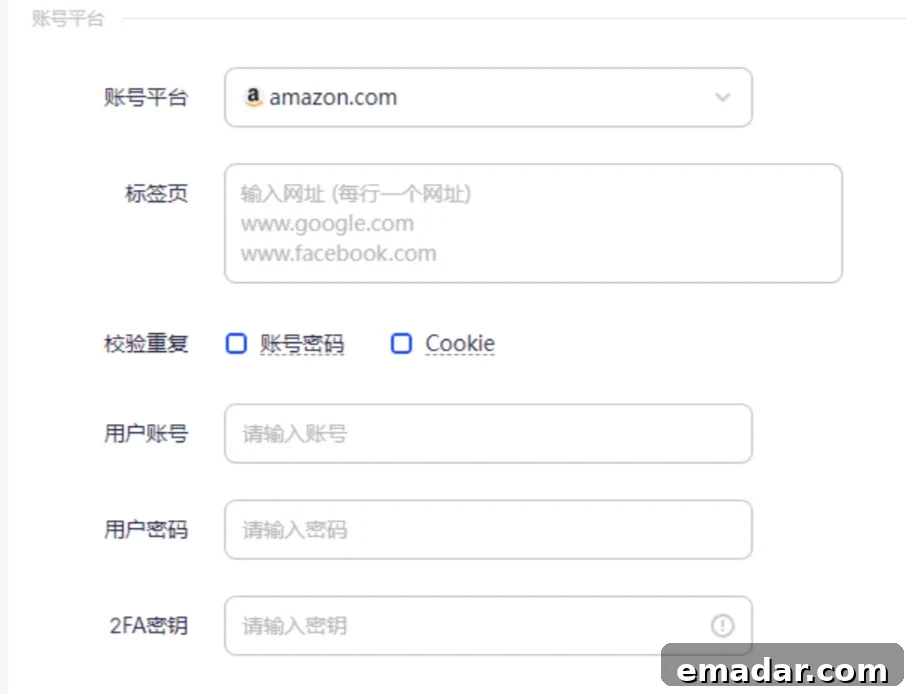
Platform account fields are optional. If you want, enter:
- Account
- Password
If you do not import account information yet, do not check “Validate duplicates.”
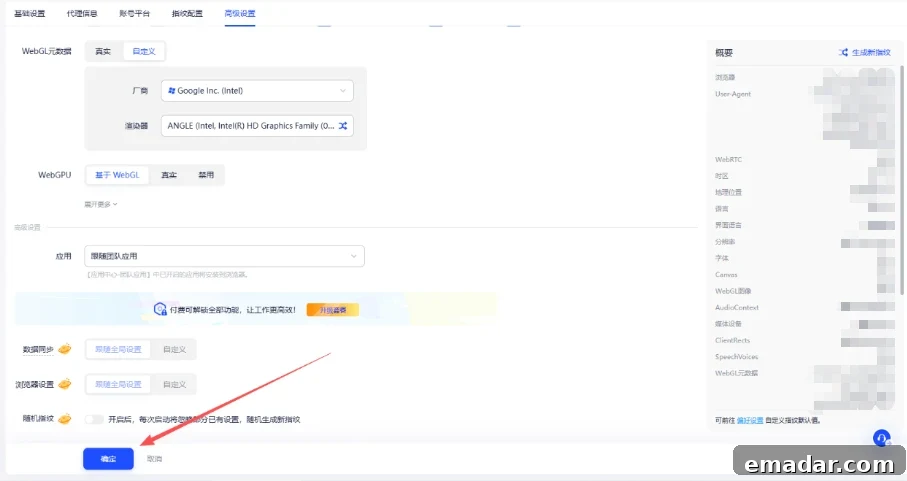
2. Browser fingerprint settings
AdsPower provides default fingerprint settings. Advanced users can customize items such as:
- User-Agent
- WebRTC
- Timezone
- Language
- Resolution
The right-side panel shows a real-time summary of the browser fingerprint.
3. Create the environment
Click “Confirm” to finish creating the browser environment.
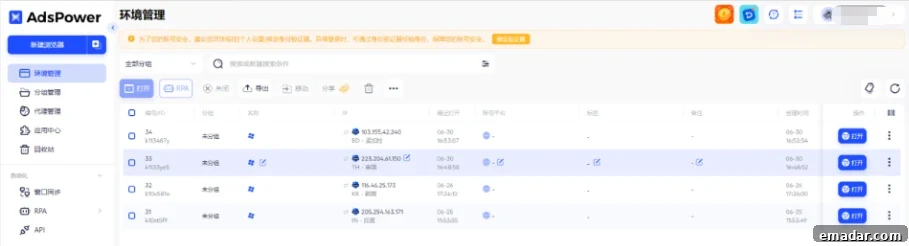
After creation, go to environment management and click “Open” to launch the browser.
How to judge whether a proxy IP is truly healthy
Some users assume that a successful proxy connection alone is enough. In reality, a reliable proxy environment should meet several criteria:
✓ Proxy connection is successful
✓ IP location matches the purchased region
✓ Timezone information is consistent
✓ ISP information is correct
✓ Network connection is stable
✓ Browser can access the target websites normally
If all these items check out, the proxy environment is generally considered usable and reliable.
Summary
With AdsPower’s Network Diagnosis feature, users can more clearly see whether a proxy or network environment has issues, greatly reducing the time and effort needed for troubleshooting.
Network anomalies, mismatched environments, and location recognition errors may be subtle in daily use but can affect downstream operations. Performing a network diagnosis before creating a browser environment—checking IP, region, ISP, and network status—has become a common best practice.
For proxy providers, high-quality network resources mean more than just connectivity: they require stability, accuracy, and consistent environment information.
IPFLY will continue collaborating with AdsPower to improve environment management and help users deploy proxies and configure network settings more efficiently.