
How to Find Your Router IP Address: A Comprehensive Guide (December 2026)
Knowing your router’s IP address, also known as the default gateway, is crucial for managing your home network. This IP address allows you to access your router’s administrative settings, troubleshoot connectivity problems, and configure advanced features such as port forwarding. As of December 2026, most home routers use private IP addresses that fall within specific ranges, such as 192.168.0.1, 192.168.1.1, or 10.0.0.1. This comprehensive guide provides step-by-step instructions tailored to different operating systems, ensuring you can easily locate this address and access your router’s settings securely.

Common Default Router IP Addresses
Many router manufacturers assign standard IP addresses to their devices at the factory. Here are some of the most common default router IP addresses:
- 192.168.1.1: This is a popular default IP address for routers from manufacturers like TP-Link, D-Link, and some NETGEAR models.
- 192.168.0.1: This address is frequently used by Linksys, Belkin, and certain ASUS routers.
- 10.0.0.1: Some Comcast/Xfinity gateways utilize this IP address.
- 192.168.100.1: This IP address is occasionally used for modem-router combinations.
If the automated methods described later in this guide don’t work, you can try entering these IP addresses directly into your web browser’s address bar. If your router uses one of these default addresses, you should be able to access the login page. However, it’s always best to verify your router’s IP address using device-specific commands for the most accurate result.
Methods to Check Router IP Address by Platform
The method for finding your router’s IP address varies depending on your operating system. Below are detailed instructions for Windows, macOS, Linux, Android, and iOS devices.
On Windows
The Command Prompt offers a straightforward way to find your router’s IP address on Windows:
- Press the Windows key + R to open the Run dialog box. Type “cmd” and press Enter to open the Command Prompt.
- In the Command Prompt window, type “ipconfig” and press Enter.
- Look for the “Default Gateway” entry under your active network adapter (e.g., Ethernet or Wi-Fi). The IP address listed next to “Default Gateway” is your router’s IP address.
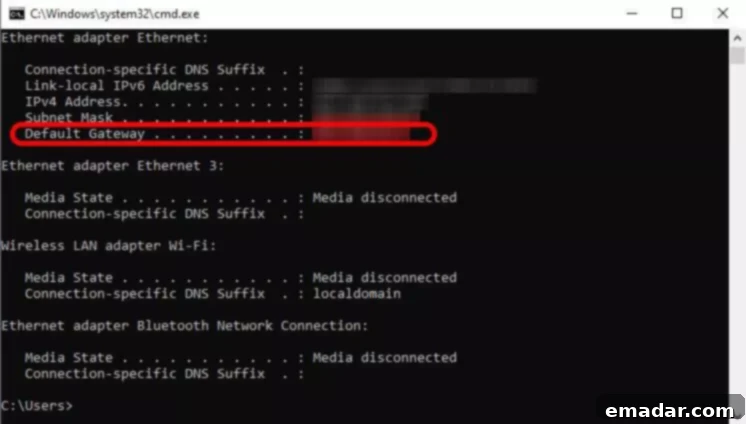
Alternatively, you can find the default gateway through the Windows Settings app:
- Open the Settings app by clicking the Start button and selecting the gear icon.
- Go to “Network & Internet” > “Status.”
- Click on “View hardware and connection properties.”
- Scroll down to find the “Default gateway” listed under your active network connection.
On macOS
To find your router’s IP address on macOS, follow these steps:
- Click the Apple menu in the top-left corner of your screen and select “System Settings.”
- In the System Settings window, click on “Network.”
- Select your connected interface (Wi-Fi or Ethernet) from the list on the left.
- Click the “Details” or “Advanced” button.
- Go to the “TCP/IP” tab.
- The router’s IP address is displayed next to “Router.”
On Linux
You can use the terminal to find your router’s IP address on Linux. Here are a few common methods:
- Using the ‘ip route’ command: Open a terminal and type “ip route | grep default” and press Enter. The output will show the default gateway, which is your router’s IP address.
- Using the ‘ip addr show’ command: Open a terminal and type “ip addr show” and press Enter. Look for your network interface (e.g., eth0 or wlan0) and find the “route” line that includes “default via.” The IP address listed after “via” is your router’s IP address.
- Using the ‘nmcli device show’ command (for NetworkManager users): Open a terminal and type “nmcli device show” and press Enter. Look for your network interface and find the “IP4.GATEWAY” entry. The IP address listed there is your router’s IP address.
These methods should work consistently across different Linux distributions, such as Ubuntu and Fedora.
On Android
The exact steps to find your router’s IP address on Android may vary slightly depending on your device’s manufacturer and Android version (e.g., Android 15 or 16 in 2026). However, the general process is as follows:
- Open the Settings app on your Android device.
- Go to “Network & Internet” > “Wi-Fi.”
- Tap on your connected Wi-Fi network.
- Tap on “Advanced” or “View more.”
- Look for the “Gateway” entry. The IP address listed there is your router’s IP address. In some cases, you may need to look in the “Static IP settings” section.
Alternatively, you can use a third-party app like WiFi Analyzer to display your router’s IP address and other network information.
On iOS/iPadOS
Finding your router’s IP address on iOS or iPadOS is straightforward:
- Open the Settings app on your iPhone or iPad.
- Tap on “Wi-Fi.”
- Tap the “i” icon next to your connected Wi-Fi network.
- Scroll down to the “Router” entry. The IP address listed there is your router’s IP address.
This method remains consistent across recent iOS versions.
Accessing the Router Admin Page Securely
Once you’ve obtained your router’s IP address, you can use it to access the router’s admin page. Here’s how:
- Open a web browser (e.g., Chrome, Firefox, Safari, Edge) on your computer or mobile device.
- Type your router’s IP address into the browser’s address bar and press Enter. For example, if your router’s IP address is 192.168.1.1, you would type http://192.168.1.1.
- You should be prompted to enter a username and password. The default credentials are often “admin” for both the username and password. Check the router’s documentation or the label on the device for the default credentials if “admin” doesn’t work.
- Once you’ve entered the correct credentials, you’ll be logged in to your router’s admin page.
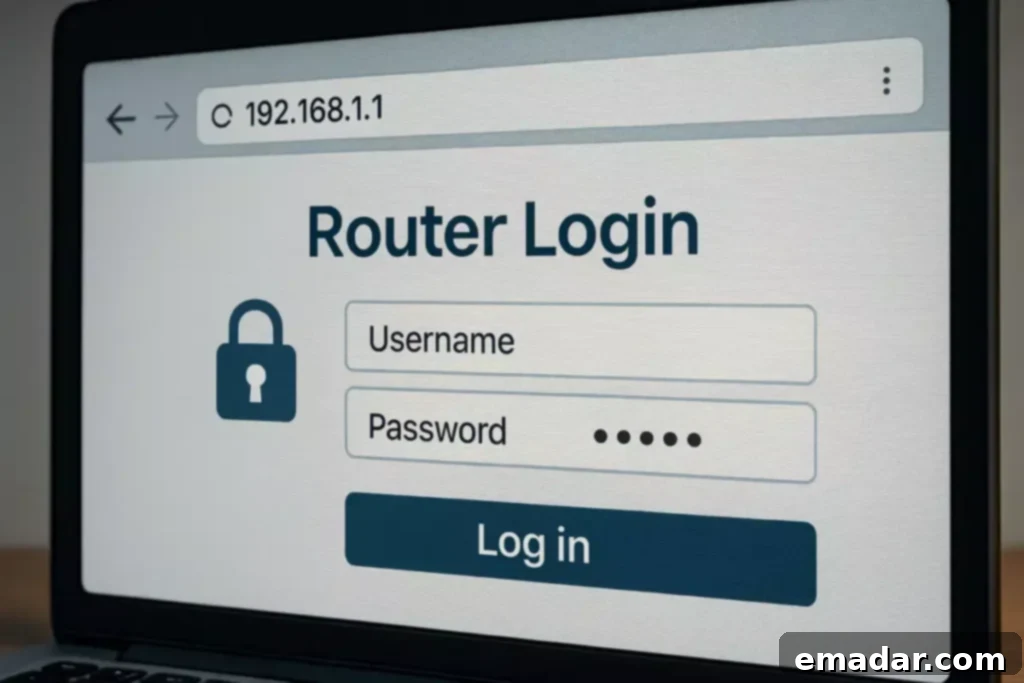
How to Access and Change Your WiFi Router Settings (2026 Edition)
Accessing your router’s settings allows you to customize various aspects of your network, such as changing the Wi-Fi password, setting up parental controls, and configuring port forwarding. However, it’s essential to prioritize security when accessing and modifying these settings.
Here are some security tips:
- Change the default admin password immediately: The default username and password (usually “admin”) are widely known, making your router vulnerable to unauthorized access. Change these credentials to a strong, unique password as soon as possible.
- Use a wired connection when possible: A wired connection is generally more secure than a wireless connection, as it’s less susceptible to eavesdropping.
- Avoid public networks: Only access your router’s settings when you’re connected to your local network. Avoid accessing the admin page from public Wi-Fi networks.
- Update your router’s firmware regularly: Firmware updates often include security patches that address vulnerabilities. Check your router manufacturer’s website for updates and install them as soon as they become available.
Integrating Proxies for Remote or Restricted Network Access
In some situations, such as remote management or when dealing with ISP restrictions, proxies can provide secure access to your router’s settings or related diagnostics. By configuring SOCKS5 or HTTP proxies in your browser, you can enhance your privacy and bypass certain limitations.
Premium Proxy Network Services: Emphasis on High Availability
For advanced networking tasks that require stable and anonymous connections, such as remote router diagnostics, it’s recommended to use reputable proxy providers. IPFLY is one such provider, offering SOCKS5-compatible proxies with a vast pool of over 90 million IPs across more than 190 countries. They offer various proxy types, including static residential proxies for persistent access, dynamic residential proxies for rotation, and datacenter proxies for high speed.
IPFLY’s features include:
- 99.9% uptime
- Unlimited concurrency
- Millisecond responses
- 24/7 support
These features make IPFLY suitable for professional-grade operations.
Comparative Analysis of Proxy Providers
IPFLY’s authentic ISP-allocated residential IPs provide exclusive and stable connections with minimal disruptions, which is a significant advantage over shared free proxies that are prone to bans and instability. The unlimited traffic offered by IPFLY supports intensive sessions, contrasting with the limitations of public options. Robust encryption prevents leaks, while low latency and global coverage enhance performance—advantages that are not consistently matched by lower-tier services that lack comprehensive support.
Troubleshooting Common Issues
If you’re unable to access your router’s IP address or admin page, here are some troubleshooting steps:
- Verify your network connection: Make sure your computer or mobile device is connected to the same network as your router.
- Disable VPNs temporarily: VPNs can sometimes interfere with network connectivity. Try disabling your VPN temporarily to see if it resolves the issue.
- Restart the router: A simple restart can often fix minor network problems. Unplug your router from the power outlet, wait 30 seconds, and then plug it back in.
- Check for custom configurations via ISP apps: Some ISPs provide apps that allow you to manage your router settings. Check if your ISP has an app and see if there are any custom configurations that might be affecting your access.
Whether you’re doing cross-border e-commerce testing, overseas social media operations, or anti-block data scraping, choosing the right proxy service on IPFLY.net is crucial. You can also join the IPFLY Telegram community to connect with industry professionals and share strategies for resolving “proxy inefficiency” issues!

Mastering Router IP Address Checks
Accurately identifying your router’s IP address is essential for effective network management and security. By following the platform-specific steps outlined in this guide and adopting secure access practices, you can maintain optimal control over your home network. For complex setups involving proxies, services like IPFLY offer reliable and secure solutions.